
As a new grower, clones are mostly attained through friends as a means to avoid seed costs or eliminate germination hassles. However, many of us fall in love with the hunt for something special, chasing that unicorn pheno that stands out from the rest, a plant so unique that others want to get a cut from you. At the core of pheno hunting is the skill of reliably getting clones to root.
Why Cloning Is Important
Cloning your cannabis plants is an essential aspect of growing. Sure, running seeds have their merits, but each seed is unique with a different genotype (the collective genetic makeup of the plant). In order to ensure you’re running the same plant each time, you’re going to have to rely on clones.
Many new growers are under the false assumption that if they buy some seeds, they’re going to get the same plant each time from the same strain. In reality, seeds aren’t much different from humans, and if you take the same two parents, sure, you and your siblings may look similar, but the differences are there.
This is where cloning becomes vital. If you take cuts of your plant, you’ll be able to keep around the exact same genotype indefinitely, allowing you to run that special plant over and over.
Note: It is beneficial to flower out plants from cut before deciding whether your plant is truly a keeper. While the genetic information remains the same across seed plants and clones, the distribution of hormones is noticeably different, and seed plants can express themselves differently from the clone.
How To Take Clones And Increasing Rooting Ratios
Let’s get to the important stuff: how to take cuts and root them with the best results. Cloning can be heartbreaking to some, as they take them too late into flower, and then they don’t root, and they don’t have a second chance other than revegging them. A successful reveg is more challenging than rooting a clone, so it’s better to get this right.
This guide is how I managed to improve my own cloning rates and went from a 60% success rate to a 90 to 95% success rate. There are other ways to do it, but here’s what I found worked best for me.
Tools You’ll Need
- A clean scalpel
- A clean pair of sharp scissors (isopropyl works well for cleaning)
- Jiffy pellets (I prefer the smaller types, usually the 33mm)
- A quality clone dome (I highly recommend Garland domes)
- A tray for holding your jiffies
- A low-strength light
- A spray bottle
- A heating matt (strongly recommended in winter)
- Labels
- Rooting hormones
Step 1. Prepare a clean cloning area
We may be working with dirt when we grow plants, but cleanliness is vital when you have plants in a high-humidity, sealed environment. Bacteria propagate rapidly in these conditions. You can work with or without gloves, but avoid using dirty tools or hands to touch the plants.
Step 2. Soak the jiffy pellets in pH’d water (6.0 – 6.5 is ideal)
During the rooting process, clones still require nutrition, just at very low levels. Healthy plants typically get it by just using the nutrients stored in their leaves. Some growers add a very light (1/8th strength) feed to their water, but I recommend going with pure pH’d tap water for healthy plants. Tap water has some micronutrients it can use in the rooting process too.
Soak the jiffies to the point where they are malleable and give them a very gentle squeeze before placing your cut to ensure there aren’t any dry coco fibers inside.

Step 3. Identify Your Clone Location
Clones can be taken anywhere on the plant; some swear by cutting the tops, while others swear by taking the lowers. Whichever you opt for, ensure the growth is healthy and not showing signs of deficiency, as this will lower your rooting rates. Look for areas with a good amount of branching attached, as these will yield more when they grow.
DO NOT attempt to take clones from sick plants unless you’re in an emergency situation. It’s usually easier to first get your plant healthy and then take your cuts. Avoid taking cuts of weak and spindly branches that are unimpressive when possible.
While cuts can root at any size, I’d recommend aiming for between 15 and 20cm.


Step 4. Take Cuts
Use your clean (ideally new) scalpel to take the cuts. I take my cuts at an angle of between 50 and 60 degrees. Taking cuts at an angle increases the surface area, increasing rooting odds. I like to take my cuts from just beneath the node. This is a practice that is commonplace and has to do mostly with plant hormones. It’s a small detail that can go a long way in improving rooting rates. If there is additional branching too close to the incision point you can remove it too (see below), but having some extra branching is great for further growth once rooted.
Once you have your clone, place it in a cup of pH’d water while you get your scissors. Placing it in water helps prevent the plant from dehydrating and wilting, something that can happen in a relatively short period (15 to 30 minutes).
This is optional, but I like to cut the ends of my clone leaves to create more space in my clone dome. Excessive leaf contact can cause molds to form. It can also help to encourage the plant to spend more energy on trying to form roots, as the leaves can make them a little lazy.


Step 5. Add Rooting Hormone and Add Stick Cut Into Jiffy
Once your clone is slimmed down a little, you can add some rooting hormone to the end of your cut (where you cut it with the scalpel). If you’re using a powder, you’d want to go with a softwood option, though I have been finding the best success with gels.
Then, place the cut into the jiffy pellet, aiming to get the tip of the cut down ¾ through the pellet. Don’t push it right to the bottom, and don’t leave it hanging, barely dug in. It should have a snug fit.
Add the jiffy to your jiffy tray.


Step 6. Label Diligently
Mistakes happen, and few are as frustrating and prevalent as labeling errors. Regardless of how sure you are, double-check your labels and ensure everything matches. The last thing you want is to have to try and refind your plant in a labeling blunder.
Step 7. Spray and Seal
Once you’ve repeated the above steps for all the cuts you wanted to take, take a spray bottle with pH’d water and give a mist over the cuts before placing them in your clone dome and sealing it tight. I also recommend spraying the inside of the dome lid. Make sure the vents are fully closed for the first 72 hours.
Step 8. Getting Them Under Light
Clones don’t need much light; in fact, too much light can make the process a lot harder for you and cause lowered rooting rates. I’ve found a PPFD of 15 to 30 to be ideal for rooting, which I then gradually increase as they finish rooting and are potted up. The process can be done with more light, but it doesn’t need to be, and more light results in more nutritional demand from the clones, resulting in more frequent deficiencies showing in the rooting process.
Important note: If you’re rooting in ambient temperatures below 22’C, it can be beneficial to use a heat mat and in temperatures under 18’C it becomes essential. When using a heat mat, ensure your jiffies are not getting too hot as this will quickly lower rooting success and cause them to dry up quickly. Aim for a jiffy temperature of around 24-26’C. You may need to place folded towels or cardboard boxes if your heat mat is not thermostat-controlled.
Step 9. Give Fresh Air
While it’s important that humidity inside your clone dome remains between humid, stagnant air that isn’t exchanged can promote mold growth. Open the lid of your clone dome about once a day and exchange the air. For the first 3 days, you can spray the clones or lid again when you put it back on to retain the desired humidity level. For the first 3 days, aim for around 80-90% humidity, and slowly taper off during the hardening-off period.
Step 10. Harden Off Cuts
After 3 to 5 days of being in a sealed dome, crack the vent to about 30% open, and over the next 2 to 3 days, continue to open the vent until it’s completely open. You can start looking for roots on this day (around days 6 to 8). Some cuts take longer than others, but seeing how quickly your clone’s root can give you valuable information as to the strengths of a particular cut.
Consider keeping notes of your rooting times in order to learn more about the mothers you’re keeping. Plants with consistent rooting issues may give insight into negative traits that could pass while breeding. Inversely, clones that excel at rooting quickly may stand out as reinforcement of their keeper status.
Once you’re happy with the number of plants that have rooted, you can take the hardening-off process to the next step by removing the dome for 10 to 15-minute periods once a day. This lets the clone acclimate to a lower ambient humidity and gets them ready for transplant.
Important: Never move your clones out of their dome until they have hardened off, or unless the environment you plan to have them under is low in light and high in humidity. Otherwise, the plants can rapidly wild.
Quick Tips
- Clones are fragile once rooted, be careful about putting them under strong lights or lower humidity until they’ve slowly been allowed to adapt to the new environment in shorter bursts.
- Take at least 2 cuts of everything you plan to route, ideally 3 or 4. Small differences in hormone distribution, plant health, and moisture levels in the dome can all cause some cuts to root and others not to, even from the same plant.
- Less is more when it comes to the light used when rooting.
- Thoroughly clean all your domes and trays before each cloning session. A 1:10 bleach/water solution is a common mixture, though use what you’re comfortable with. This is to remove potential bacteria and fungus which can form inside the high humidity.
- Always ensure, when using a heat mat, that the temperatures the plugs receive is not too hot.
Overall, cloning can feel a little challenging at first. But after you’ve found what works for you, it becomes a lot less stressful. If you’ve already found what works for you, I recommend sticking with that – however, if you’re still looking for what works in your case – I hope this article could be beneficial.
Let us know in the comments if you have any questions.
Popular Products
-
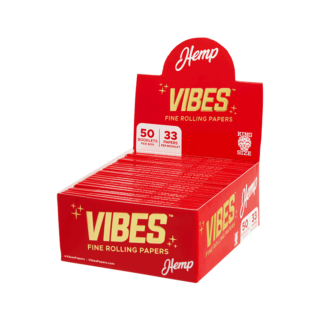 Vibes Rolling Papers- Hemp- King Size Slim
R36.00
R21.60 -
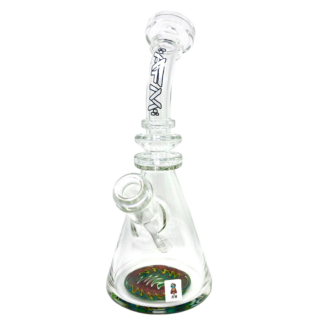 The Rasta Rig (23cm)
R1,999.00
R1,199.40 -
 Vibes Rolling Papers - Ultra Thin- King Size Slim
Price range: R36.00 through R1,750.00
Price range: R21.60 through R1,050.00
Leave a Reply